Shabby Miss Jenn

Friday, December 2, 2011

Birdhouse Christmas Quilt

Here is a quilt I made as a Christmas gift for a dear friend at ScrapStreet.com Magazine, Ms. Linda.  I really enjoyed putting this together, and will someday have to make one for myself because it looks even better in person than it does in a photograph.  Fused applique, machine quilting.  Love how bright the cardinals are!


Tuesday, November 29, 2011

Amaryllis Quilt and Christmas Gifts

I decorated for the holiday over the Thanksgiving weekend.  One of my favorite parts of decorating is pulling out my holiday quilts.  I'll try to feature a few of them here over the next few weeks.

I made this amaryllis quilt several years ago, from a Susan Du Laney pattern.  The flowers, leaves, and bulb are stuffed, giving wonderful relief from the background.  (No, I *still* haven't embroidered the roots. I also plan to add a little shading with chalks or Copic markers to the bottom of the bulb and the stem/leaf areas.  Someday.)  It is hung at the top of the stairs, and quite lovely to look at every time I walk upstairs during the holiday season.


One of my bees, Cyberbee, will have our annual holiday party on the 10th of December.  We only meet 4-6 times a year, several of which are all-day meetings.   It's all about catching up, sharing both food and sewing projects, show and tell (and what a great show and tell this one is with all the holiday quilts and gifts being shown off!), and a gift exchange for those who signed up.  The gift can be anything, store bought or hand made.  This year, I'll be giving some fabric, chocolate, and two handmade items: a needle book and a notebook cover. 

This is the needlebook.  One nice thing about quilting and scrapping is the number of tools that can be used for both types of project.  I used my die cutting machine and some QuikKutz and Tim Holtz dies to cut out the pieces for this needlebook.  The flowers are attached with french knots, and the leaves (which I hand cut) with a simple vein down the center.  All of the felt is from Papertrey Ink - they make a gorgeous range of colors and it cuts like butter.  I used a white lining and a piece of the melon berry felt for the inner leaves of the needlebook. The recipient's name is embroidered in the upper right quadrant, but I blurred it out in case she reads my blog.


The lining: 

The quilter who gets the needle book will also be getting this notebook and notebook cover:


I dyed dryer sheets with Dyna Flow to try to get green and teal colors that would coordinate with the background fabric.  While the green turned out great, the teal was not as bright as I had wished.  I pulled out the die cut machine again and cut a variety of circles and rings, then arranged them on top of 2 layers of un-dyed dryer sheets (to brighten the colors and reduce the transparency) below the colored circles.  I fused on a very thin layer of angelina fibers to give it some shimmer.  I layered the background fabric and a stabilizer, then free motion stitched the circles onto them and trimmed away the excess, undyed dryer sheets.  Some beads and couching with a variegated yarn in green and teals finished it up.

I made one more notebook cover; this one will probably be for one of the boys' teachers, and I'll be making another one for my other son's teachers. I went simple with this just fused a beautiful peony blossom onto a green pinked square, and added them to a dark brown speckled fabric.  A bit of stippling brightened up the brown fabric.


Sunday, November 13, 2011

Seahorse Quilts

So I finished Jeremy's seahorse quilt before the end of August, but just haven't managed to get pictures taken and posted.  I made time to do so today.  When I wrote about it last, he'd had me paint onto the partially-quilted surface - a new adventure for me.  I then quilted in the water, using multiple shades of blue threads in the painted areas, and a slightly blued white thread in the unpainted parts of the background.  In keeping with his preference for all things shiny, all of the threads were shimmery and glittery.  I also added some hotfix crystals for "bubbles".  I satin stitched the edges and couched a single frame of a multihued fiber (perfect for this little quilt, with blues, teals and browns) around the outer edge.  

I brought it to Jeremy, showed it to him, and asked him if he liked it.  Those of you who read this post are probably shaking your heads right now, thinking "she'll never learn."  Sure enough, Jeremy did not agree with me that the piece was complete.  He looked at it for a few minutes, told me how much he loved the paint and the crystals, and then informed me that it needed another row of the fibers along the outer edge, just a little bit apart from the first one.

"No, it's fine as it is", I insisted.  It looked complete to me.  But he turned on those baby blues of his and I added another row of the fiber.  And I have to admit, that while it was just fine with one fiber border, the second border really added definition and set off the piece better.  And here it is:


And a detail shot of the seahorse on the bottom:


This was a great piece for me to practice with new techniques before going onto the bigger piece.  I also learned that Jeremy has a good, intuitive eye for balance and design, and is NOT afraid to share his opinion when asked for it.

So I moved onto the original piece I had intended to make before this little side trip.  It is a beach-themed, mixed media piece called "Live in the Current".


The 3 main panels were cut from felted wool, in shades of blue, green, and purple, that was needle felted directly to batting.  After the felting was done, I hand-stitched a variety of fibers on the top, and did some embroidery as well.  I fused the needle felted sheet to timtex to give it some stiffness, added backing, and did light machine quilting to give additional texture.  I then cut it into three panels, and did a double-layer of satin stitch in a variegated thread to finish them off.


The "library cards" are digital images by Katie Pertiet (Library Card Collection: Seaside) that were printed onto background fabric that I made in Susan Brubaker Knapp's class in June.  The background fabric was painted with very dilute Lumiere paint, and it glitters slightly.  I batted and back them, then stitched outline stitched the critters and the lines of the index cards with Monopoly thread.  I inked the edges for a little more definition, and attached them to the felted cards with small clips.


The background has the same seahorse and seaweed used in Jeremy's quilt on the right, as well as a shell on the top-left corner.  These were stenciled with Shiva paint sticks.  I used two of the images from Katie Pertiet's Beachy Clusters to create the layers and cut stencils.  I used a Silhouette America cut file to create a stencil for the seaweed.


To create the title, I used letter stamps (by Autumn Leaves), then filled in the letters using Copic markers.  I added a little bit of sparkle to those letters by selectively outlining with a Spica glitter pen.  After quilting it, I decided to add a little blue and purple color to the background with Faber Castel Gelatos, and using water and a stencil brush to dilute the color across the background in washes. I decided not to bind it, and instead, faced and turned the edges, so the design goes right to the edge.


Sunday, October 23, 2011

Witches hats and acorn treats

Do you pin?  I'm talking about Pinterest, a digital pinboard site that allows the collection of themed pictures of your choosing.  It's a total time sink, and I can spend hours there looking through the art, crafts, foods, decorating, and other images that are pinned to peoples' boards.  My boards are here, if you're interested in taking a look or, even better, following my boards.

I've had fun the last few days making Halloween treats and some fall snacks, all thanks to Pinterest.

First up: witches' hats.  The directions are found here.  If you go to the recipe, you'll see that the professional's look much better than mine.  I used cookie icing, instead of a thin frosting, to make the bows, and they got all melty.  That didn't stop the kids from eating them, though! 

Sweet witch hats.


 Next up: chocolate and peanut butter acorns.  I loved this idea, and they are cute and easy to make. Matthew helped me make them, and it was a nice way to spend time together.  Recipe is here.

Yummy!

And finally, a pin that showed gorgeous single-serve apple pies in a basket, with a link to Williams-Sonoma and their apple pocket pie mold.  Here are mine.  Jeremy absolutely loves any kind of pie, and had a ball helping me make a few of these today.  They'll fit right into a sandwich bag and he can pack them in his lunch.

Mmmm... just needs a spoonful of ice cream.
I'm also going to make the oreo cookie mummy pops again (see last year's post), over the next evening or two.  I have the correct eyes this time, so hopefully they'll look even better this year.


Sunday, July 17, 2011

Jeremy's Seahorse Quilt

I'm working on a mixed media piece.  (Some of the background fabric was shown in yesterday's post.)  It will be a tryptich-style for the main elements, in a sea theme, but on a stenciled, painted, and quilted background, which looks like sand.

Using my Silhouette and a seaweed cut file from the Silhouette studio, I created a vinyl mask for the seaweed, then adhered it to the fabric and applied Lumiere paint.  However, it was too wet, and bled a lot around the stencil edges.  My son Jeremy wanted it, though, so I decided to use it as practice piece for the background to the mixed-media piece, and to give it to him when it's done.

With the Silhouette and a seahorse cutfile, I used Shiva paintsticks to add two seahorses.  Being a semi-solid, I didn't have trouble with the Shiva paint bleeding under the vinyl mask. After the paints had cured and been ironed, I was able to quilt the images today.  Using Madeira Glamour threads to add more sparkle (because Jeremy loves all things shiny), I added detail to the seahorses and outlined the seaweed.

When I showed it to Jeremy and asked if he wanted wavy lines for the water, he told me I needed to paint a few areas with blue - not too much - and use that for the water.  While he didn't realize it, it was a great, out-of-the-box challenge  for me.  I pulled out my Twinkling H2O watercolors to add the color and yet more shine.  (These paints have mica flakes in them for added shimmer.)   While it's not perfect, I like the way it came out and it was a great practice piece.


Now it's drying, and I hope to finish quilting in the water tomorrow, and get it bound (or perhaps edge finished with some fibers) and hanging in his room.  And then to complete the mixed media piece...

Saturday, July 16, 2011

Surface Design Madness

Time got away from me and I'm finally posting about the surface design class I took with Susan Brubaker Knapp at the NC Quilt Symposium.

We started off playing with Tyvek - that plastic stuff they wrap houses in before putting on siding.  It got painted with Lumiere paints, then you place it between parchment paper and heat it with an iron and it gets all bubbly and the colors intensify.  Depending on which side (painted or not) is up, you get bubbles or craters.  The fish below is 3 pieces; the fins were odd shapes that shrunk like that on their own.  I did a little "surgery" on the fish body (the tail fins) to get the shape I wanted.  These are 3 separate pieces, but can now be glued or sewn onto whatever base I want to use.

The beads to the left of the fish are tyvek beads, made by painting, wrapping around skewers, then heating.  They were then wrapped with wire and beads.  The bit up at the top is angelina, heated on an inked rubber stamp. 

We did a lot with the Lumiere paints.  In the next image, fusible web was painted with Lumiere and when it was mostly dry, ironed onto fabric.  I had one large piece of fusible web, painted with blue and blue-green, and cut it in half.  You can see how the background color makes it look bluer (on the white fabric ) and more silver (on the black fabric).  The bits that peeled away were still wet when ironed, which could be used as a deliberate technique for making something look distressed.  But I'll have to be careful to place parchment paper over them if I have to iron them, unless I want to glue my iron to the ironing board!

This is lumiere painted onto steam a seam fusible web that had  been pre-wet.  The pre-wetting helped the paint colors run together.  It was ironed on wet.  The left side of the image below is the painted fusible web - bright and shiny.  However, I ended up liking the back side even more - some of the paint came through to the back, giving a subtle shine in organic shapes. I think it would be great for backgrounds.

We also played with diluted Lumiere.   I took a bit of my plain white fabric and dipped into diluted purple paint.  The shine remained, but I over-diluted it and it was a barely there lilac color after wringing out the fabric.  So I added a few globs of teal and purple and smooshed the fabric all around and ended up with this.  I'm currently using it as background fabric for some digitally-printed images.

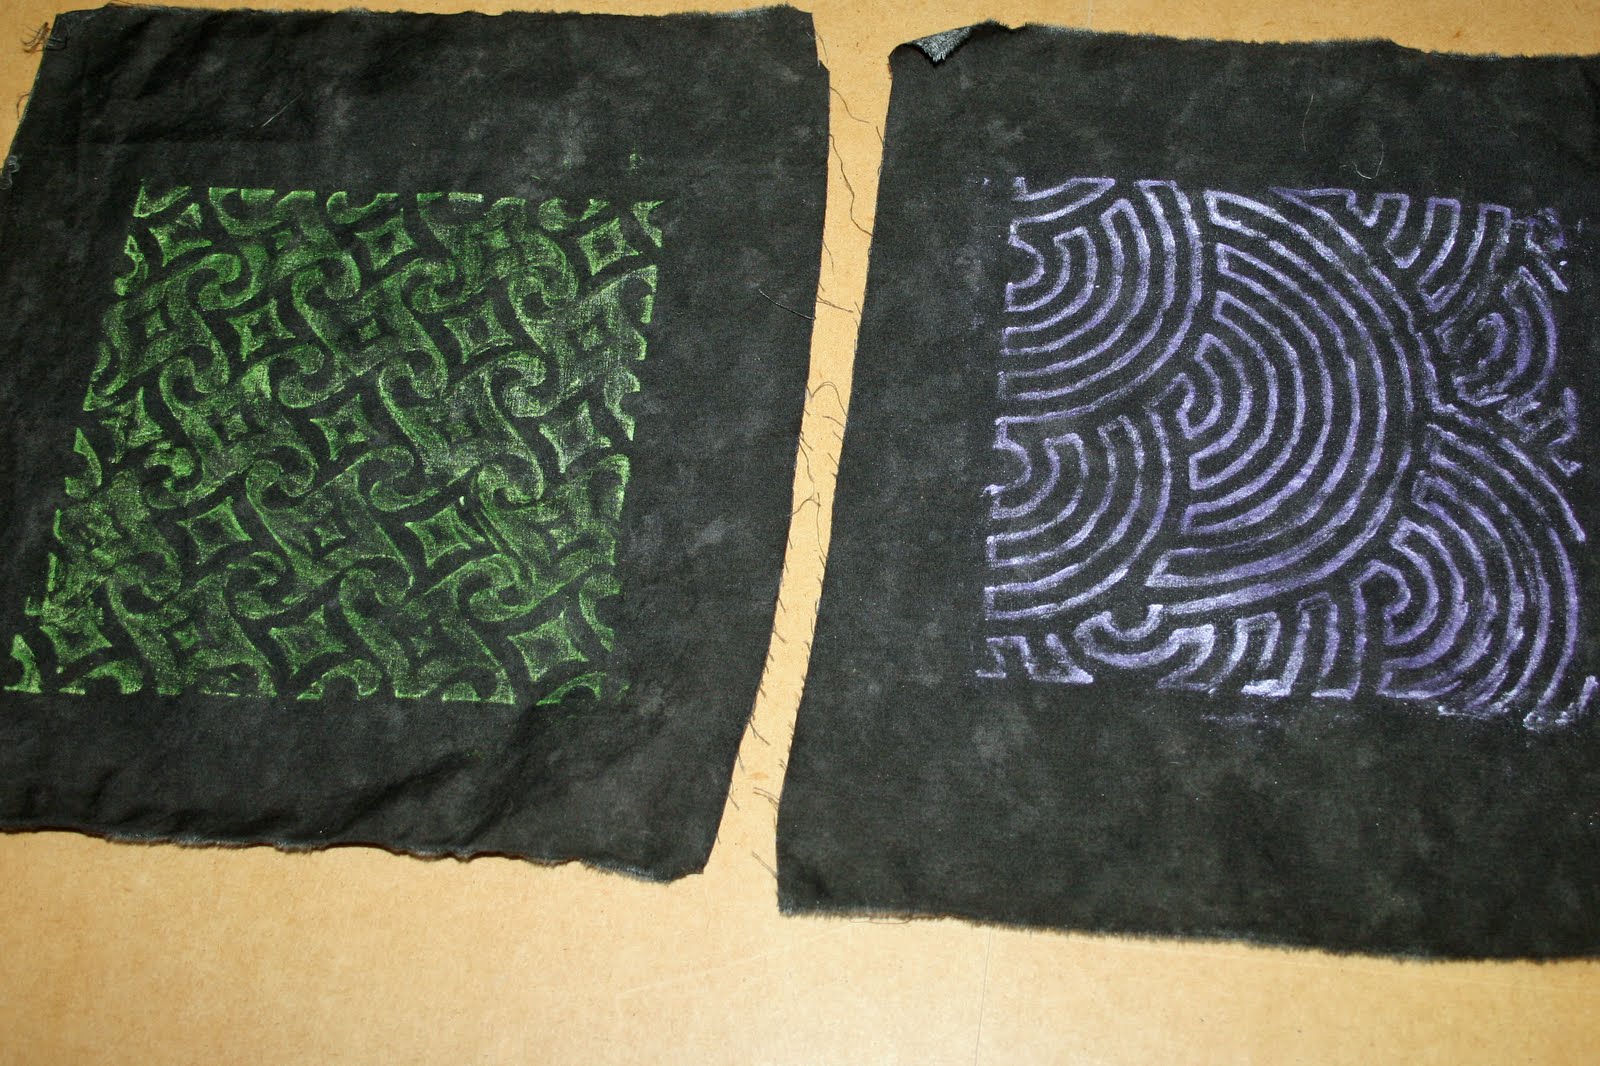
We played with Shiva sticks too, using them on top of templates.  I was boring and just did one color per plate.  Some of the more adventurous gals mixed a bunch of images and created their own multi-patterned fabrics.


And here is, hands-down, my favorite piece of the day.  We used Caran d'ache Neocolor crayons directly on the fabric to color an image, then used water and paintbrushes to paint them out.  I am not practiced at drawing, but I do know (thanks to the inspiration wednesday videos that Donna Downey posts on her blog) how to draw a poppy.  So I did that with purple crayons, and gave them a gold/orange background.  I'll be quilting this piece and hanging it in my office/sewing room because it's just so bright and cheerful. 


Susan is a fabulous teacher - she did a great job of explaining her techniques, the various modifications that could be made, and then stepping back and letting us "play".  I'd happily take another class with her!  Here is a link to her blog, Blue Moon River.

Monday, June 27, 2011

The Big Purse Alternative

I'm in two local quilting bees, one of which is Cyberbee.  We meet quarterly or so, and "talk" via email otherwise.  At our meeting a few months ago, Barbara showed us some darling purses made from placemats.  (Yes, you read that correctly.)  (ETA:  Barbara has been in touch and told me that she got the pattern from Threads magazine, if you're looking to try it out for yourself.)  These little, 2-pocket bags, in which you could put your license, credit card, check book, and cell phone, are a perfect alternative to lugging a big purse.  Great for quick errands, or kids' sports games/practices.

I ran out and picked up a few placemats, along with some pretty trims for shoulder straps and big, chunky buttons.  When selecting placemats, I found that really heavy/thick ones don't work very well (hard to fold, hard to sew through).  Placemats with pretty borders along one of the short sides worked best, as those borders become the flap and add a nice decorative touch.

Here are the 4 I made over the weekend (straps were tucked inside for the picture):


I made a minor change from Barbara's models - I sewed down a triangle of fabric on the outside of the front pocket so that it could be accessed more easily.  Here's a picture of an open purse, showing the pocket and the strap:


Lessons learned (the hard way, of course :) )
Figure out placement and sew the buttons on FIRST.
Add the button loop and the shoulder straps BEFORE you sew the sides together.
Keep the seam ripper handy. (Not a lesson from this project, but one I learned a long time ago and of which I was rather strongly reminded over the weekend.)

These will be given to Mom, Margaret, Kitty, and Cat.  Surprise!

Friday, June 17, 2011

Quilted and Needle Felted iPad Bag

For our 10th anniversary, Ryan spoiled me with an iPad2, with a slick little magnetic cover.  I love it, and it's been great for all the waiting-around time I have with the kids (carpool, games, practices, etc.).

At the NCQSI a few weeks ago, I got some fun fibers from the YLI booth - organic cotton, hand dyed lacings (think shoe lace like), which, if you pulled up one thread, ruched beautifully.


I pulled out my needle felter, some blue scrim, various wool pre-felts and wool rovings, and some silk carrier rods and had fun making this fabric.  After the wools and silks were attached, I machine quilted it using variegated thread in a plaid pattern.  I then ruched up some of the lacing and added it to the top of the piece.


Today I made it into a padded bag to hold my iPad.  While I had picked out a glorious sunflower fabric to be the back side, Jeremy wanted something a little less "girly looking" for when he gets a chance to use the iPad.  So I switched to this mosaic-style fabric instead.


I decided to use piping around the top edge, to give a more finished look, and a flap to make sure that the iPad doesn't fall out.  I had recently picked up some of Nancy Zieman's Wrap 'n Fuse Piping and decided to give it a try.


 I had two pieces of piping in about 2 minutes (cutting out the fabric strips and ironing it around the piping).  I made a 3" wide flap, added the buttonhole, both miraculously BEFORE sewing the bag together.  


Wednesday, June 15, 2011

End of the Summer Baseball Season

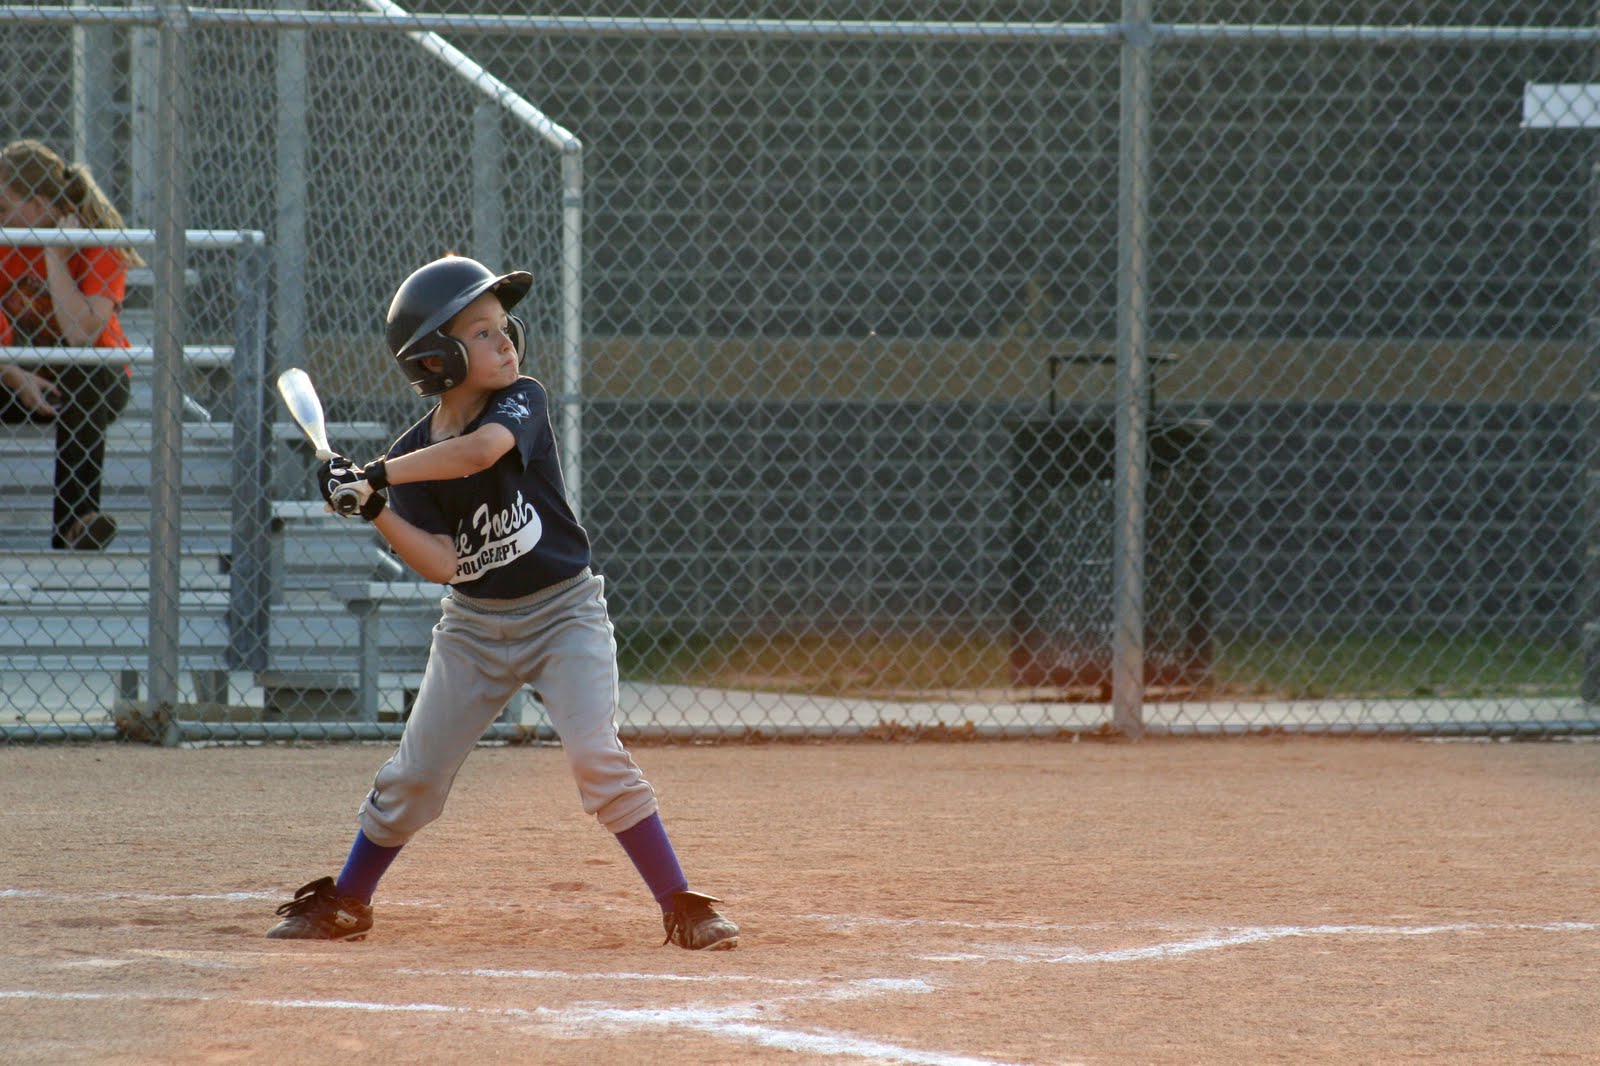
Matthew was on the Defenders team this year, and they did great, ending the season with a 9-1 record.  He missed 3 of the games due to a broken arm and the stomach bug, but really enjoyed being on the team.  Here are a few pix from last night's game, one of him batting (just look at the determination on his face), and one of him in the "ready" position at shortstop (taken from behind first base, with a runner on the base).


Jeremy could care less about baseball, and either plays in the adjoining field or - when Ryan gives him his iPhone - spends the time playing video games, as he did last night.


In the fall, Matthew will begin machine pitch.  Should be interesting.

Monday, June 6, 2011

NC Quilt Symposium

I spent Saturday and Sunday at the NCQSI, the annual state-wide quilt show, which was held at Peace College in Raleigh this year. I had Saturday morning free to view the show, and it was a nice one this year.

This was Best of Show, Swamp Hibiscus by Judith Heyward. It was beautufully designed and the machine quilting was marvelous.


This appliqued bird quilt was a real showpiece. It was entirely hand-quilted. The corners between the blocks had birds quilted into them, and it appeared that no two were the same. I think that the applique patterns were used as the source for the quilting patterns for the birds.


This spectacular quilt, Daffodil O'Keefe by Katherine McNeese, had me making second and third walks through the section it was hanging in so I could see it again.  So realistic you could reach out and pick it!


Maggie Trees a Coon, by my friend Jeanne


A marvelous miniature Baltimore album, and a detail of it. Just look at the hand quilting!


This beauty was made from an antique table cloth of the creator's husband's grandmother.  It was gorgeously quilted.


The vendor mall enjoyed my visit, too.  I got some wonderful wool roving from Annie's Keepsakes; to-die-for hand-died silk handkerchiefs, organic cotton ricrac (which will ruche automatically if you pull one thread from an unraveled end), and gimp from YLI; and a felting book from Schoolhouse.  After that, I sat on this marvelous rocking-chair porch in the quad and relaxed for a bit before meeting friends for lunch and my afternoon class.  More about that tomorrow!