I give up! On trying to add new blogwear that is. It's too cumbersome on this platform. So my blog has moved to:
www.familyphotosfabric.tumblr.com
See you there!
Monday, September 23, 2013
Sunday, September 15, 2013
Pardon the Dust
hello.
i did not actually fall off the face of the planet, though i could certainly see how you'd think that.
pardon me while i clean out the dust bunnies...

whew, lots of dust gathered here.
looks like i've been gone for about 18 months or so.
thinking i'll skip a major catch up, clean up the blog a bit, and try to post something new.
Tuesday, February 7, 2012
Sunflower Quilt
I spent the week after Christmas cleaning out my office/studio and closet. The "closet" is a huge, 10x10 foot space with built-in shelves along one wall. I use the shelves to store my fabric stash. Two of the walls are only half-height, as the roof slants in and, short as I am, even I can't stand up at the wall edge. The rest of the space is storage for various art supplies, gift wrap supplies, and anything else that needs a home. It is also Christmas central. And by the time Christmas was over, I literally couldn't even walk into it. Now it is beautifully organized, and I've set up my desk in the center for all of my painting/sketching endeavors.
In the cleaning and sorting that went on, I found several UFOs - "unfinished objects" in quilt-speak - in various stages of completion. One of them was a 6-block, fusible applique sunflower top, about 15x20 inches. Last week I got it batted and ready for quilting. I did FMQ around the sunflowers, and once again used the faux piping binding technique I wrote about last time.

As I was quilting it, I was trying to decide what to do with it, when I remembered that a cousin had mentioned his wife's love of sunflowers and had asked me if someday I'd make a sunflower quilt for her. Voila! Perfect solution. Last weekend was gray and dreary, and working on this quilt was a bright and cheerful escape from the gloom. I hope she will find it as bright and happy as I did!
Sunday, January 22, 2012
In Praise of Aurifil's Wool Thread
Among the plethora of giveaways by various blogs and manufacturer's during the weeks prior to Christmas, Aurifil ran the "safecracker" contest. The winner who guessed a 6-digit number correctly would win 200 spools of 12-weight Lana wool thread. The contest was held over the course of a few weeks, during which periodic clues were given out.
A few days before Christmas, I got an email from Alex Veronelli, the Product Manager for Aurifil, letting me know that I had won the contest.
*THUD*
I absolutely could not believe it, but he assured me it wasn't a joke, and a very large box of thread showed up at my house the week after Christmas.
I now live in thread heaven! Every color under the sun was in that box. And it was the large spools of thread, too. From their website, I learned that this wool thread can be used for hand embroidery and applique, but also in both long-arm and domestic sewing machines for machine applique and quilting.
I finally had a chance to give it a try this week. First, I pulled out a wool applique pattern I'd bought a few years ago - A Time to Plant by Threads That Bind (Shawn Williams).

I had traced the pattern pieces onto freezer paper, but hadn't cut anything out yet. Why? Because I really didn't want to use the same color brown floss for all the pieces, I wanted to color match each one. And I didn't have that much floss on hand. And I find that regular thread is a little too thin for wool applique work.
But now I had the luxury of having available every possible color I needed, and I got the colors selected and the pieces cut out quickly. I used the Lana thread to hand-applique the stripe onto the pig, the door onto the bee skep, the inside shadows on the watering can, the holes on the birdhouses, the white stripe onto the flag, and the pots into a stack. The Lana thread just melted into the wool, and blended perfectly into the background. LOVE! Here are a few detail shots:


I've got a ways to go, but a few nights' of TV watching should have this finished up in no time.
Then I decided to give the thread a try in my machine. I have to admit, that I was a little concerned about how thick it was, but it threaded easily. Using a sketch, I put together a highly-textured block of burlap with squares and rectangles of silk, scrim and organza. I zigzagged the edges down with the Lana thread, and it sewed beautifully, and due to it's heavy weight, sat on the surface and became a lovely design element.
At Christmas, my brother gave me some silk hankies by the Tentakulum group, and I wanted to play with them. (Examples can be found at the YLI website.) I needle felted them down onto a disk of wool, and got these lovely, dimensional flowers. To create the centers, I added some wool locks from Living Felt (my favorite online wool distributor), and added a few beads to give just a bit more sparkle. Aren't they gorgeous?

After blanket stiching down some wool stems and leaves (again using the Lana thread), I removed the flowers (they were not attached yet) to prep the top for quilting. I wanted to balance the quilting across the whole piece, so I added two "ghost" flowers to the left side of the panel, simply using green, turquoise, and purple thread to outline flowers comparable in size and scale to those with the silk and wool. The heavy wool thread sits beautifully on the top of the batik background fabric, providing a nice design element without detracting from those gorgeous silk flowers.

I used an elongated stipple for the background, and everything popped nicely. Here is the finished piece, which is 16x20. I used the faux piping binding technique that was so beautifully described by Trisha at TLC Stitches.

So, thanks to Aurifil for such a generous giveaway. To pay it forward, I will be doing a few giveaways here on the blog, and giving some to the members of my bees. Stay tuned!
Thursday, January 19, 2012
Happy National Popcorn Day!
They pretty much have a day for everything now, don't they? But this one - for me, at least - was fun. I read a blurb about it a few months ago in Paper Crafts magazine, and put it on my to do list. Because all of my guys LOVE popcorn.


Matthew has a particular thing for it. I did this page several years ago, but he hasn't changed since. If given the opportunity, he can down a large bucket at the movie theater with no problem.

To "celebrate" this important national holiday, I made envelopes containing a bag of microwave popcorn to give to my 3 guys, the boys' teachers, and my in-laws. The popcorn box was made using a Silhouette 3-D popcorn box template. I modified it to only present one face of the box. October Afternoon's Egg Basket paper from the Cherry Hill line made for perfect popcorn, don't you think? (Unfortunately, though I scaled the font to be large enough to read on the background piece of paper, ever since Epson "upgraded" their printer interface, my wide-format printer, which is supposed to give edge-to-edge printing, won't do so. It will no longer print pages larger than 8.5x11, which was the whole point of my getting that printer. And so the font printed much smaller than I'd like it to be.)

Make sure you have a bit of popcorn today!
Saturday, January 14, 2012
Change, Art Journals, and Doodling
When I was a girl, I loved drawing and sketching. As I began having more homework and and a part-time job in high school, I gave up those activities. This year, I'm trying to relearn these skills. I am also going to keep art journals, for practicing those skills, as well as mixed media art. To get started on drawing/sketching again, I'm taking a variety of online classes: two workshops (one on sketching, one on watercoloring) by Alisa Burke, and two of the free Strathmore online classes: doodling with Traci Bautista, and, later in the year, watercolor sketching with Carol Johnson.


To approach the journaling, I joined the Art Journal Caravan (AJC) with Tangie Baxter at scrapbookgraphics. This workshop provides a variety of weekly journaling prompts, guidance, and technique instruction, as well as a forum for group participation. While scrapbookgraphics is a digital scrapbooking site, the AJC is open to digital, traditional, and hybrid participants.

I wrote quotes having to do with change around the sides:
One of Tangie's first challenges was to choose a word of the year. "This a word that you will focus on for the WHOLE YEAR. Instead of setting so many overwhelming "New Year's Resolutions" for yourself, the idea is to find a word that inspires all your goals in one small word. A word that should be displayed prominently at your work space, in your journal, in your mental images. " I've been doing that instead of resolutions for several years now, but Tangie added a new spin - create a personal symbol for your word of the year, and incorporate it into your journal.
For a variety of reasons, my word this year is CHANGE. While a butterfly first came to mind, after thinking about it, I realized that the butterfly represented the final stage of a process of change, and was not really what I wanted as my symbol. But it still spoke to me as being appropriate for my word. As I googled butterfly images, a few chrysalis images popped up and i had an "aha" moment. A chrysalis is a self-created safe haven for growth and change, for internally-directed adaptation.
After googling a variety of chrysalises, I sketched and then watercolored this image. A fantasy chrysalis in my favorite color, purple, with some bright yellow and greens for high contrast. The creation of it lived up to my word of the year - twice I thought I
knew what I wanted, and executed the idea, and didn't like it. Instead of
letting myself get upset, I changed my approach again until it all gelled and
resulted in this piece of mixed media art - which I love.
It will reside to the left of my monitor where I can see it while I am
working and creating.

Supplies: Watercolor: Caran d'ache
Neocolor II; Pastels: PanPastels/Sofft Tools;
Oil Pastels: Crayola Water
Soluble; Ink: Dr. Ph. Martin's India Ink,
Tattered Angels
Glimmer Mist; Pens: Pigma Micron, atyou Spica; Paper: Pink Paislee, Strathmore
400 Series watercolor 140 pound; Charm, Rub-ons: Pink Paislee; Adhesive: 3M,
foam mounting tape; Other: sewing machine, thread,
bubble wrap.
I wrote quotes having to do with change around the sides:
- Nothing changes if nothing changes. Anon.
- Change does not roll in on the wheels of inevitability, but comes through continuous struggle. Martin Luther King, Jr.
- If you don't like something, change it. If you can't change it, change your attitude. Maya Angelou
- The need for change bulldozed a road down the center of my mind. Maya Angelou
Traci's doodling class began the day after New Year's. While I was watching the video for the first lesson, Matthew joined me partway through and was fascinated. He decided he wanted to take the class with me. As we were working on the first layer, Jeremy poked his head in and decided he wanted in on the fun. So we're all doing it together.
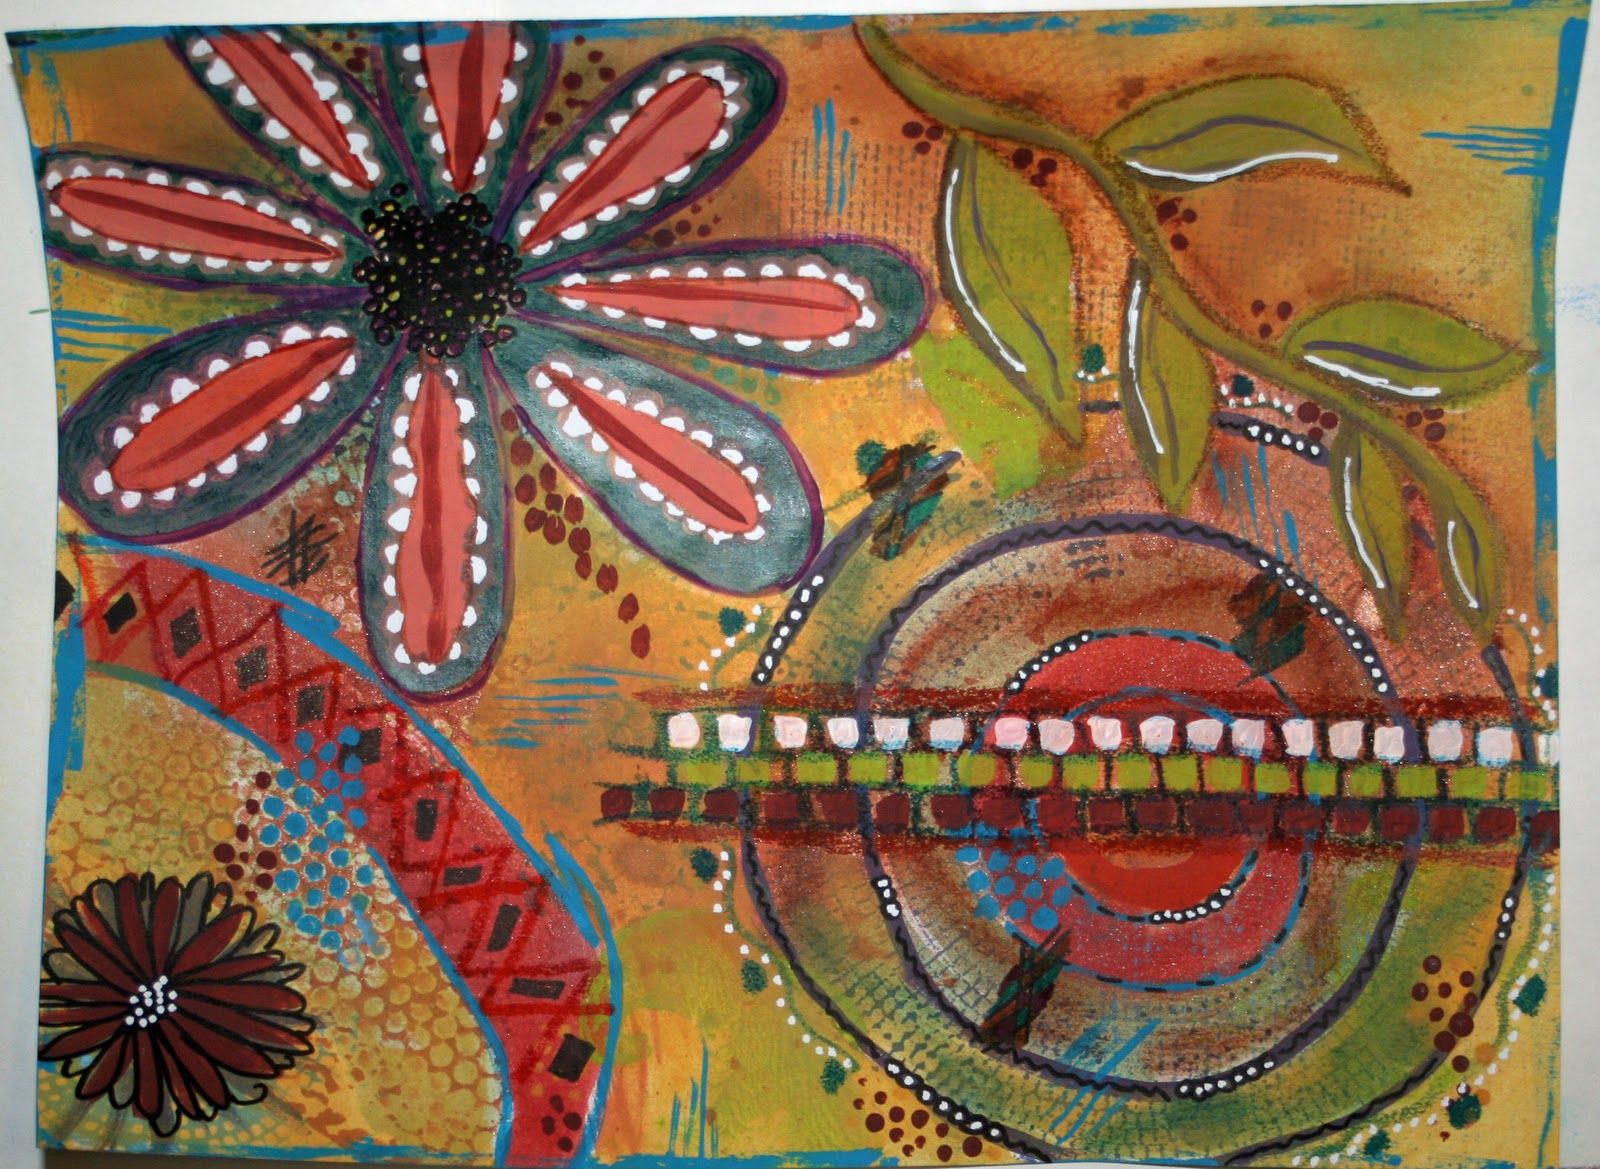
The first lesson is about layers of color building up to the final project: first, spray acrylic or watercolor paint over stencils, then adding layers of marks with different media (paint, oil pastels, sharpies, markers, and white out). It is not planned art, just free form marks and doodling. The boys are still working on their projects, and I'll post them when they're done.
Here are my first 2 attempts. I like parts of both of them. I used Glimmer Mist as the base layer on both pieces. There is also Lumiere paint on one of the top layers on the first piece, and as you can see it reflects a lot of light. These are meant to be used for other projects, and not used as art per se. I'm leaning toward notepad covers and bookmark backs, but have not made up my mind yet.

Friday, December 2, 2011
Birdhouse Christmas Quilt
Here is a quilt I made as a Christmas gift for a dear friend at ScrapStreet.com Magazine, Ms. Linda. I really enjoyed putting this together, and will someday have to make one for myself because it looks even better in person than it does in a photograph. Fused applique, machine quilting. Love how bright the cardinals are!

Tuesday, November 29, 2011
Amaryllis Quilt and Christmas Gifts
I decorated for the holiday over the Thanksgiving weekend. One of my favorite parts of decorating is pulling out my holiday quilts. I'll try to feature a few of them here over the next few weeks.
I made this amaryllis quilt several years ago, from a Susan Du Laney pattern. The flowers, leaves, and bulb are stuffed, giving wonderful relief from the background. (No, I *still* haven't embroidered the roots. I also plan to add a little shading with chalks or Copic markers to the bottom of the bulb and the stem/leaf areas. Someday.) It is hung at the top of the stairs, and quite lovely to look at every time I walk upstairs during the holiday season.

One of my bees, Cyberbee, will have our annual holiday party on the 10th of December. We only meet 4-6 times a year, several of which are all-day meetings. It's all about catching up, sharing both food and sewing projects, show and tell (and what a great show and tell this one is with all the holiday quilts and gifts being shown off!), and a gift exchange for those who signed up. The gift can be anything, store bought or hand made. This year, I'll be giving some fabric, chocolate, and two handmade items: a needle book and a notebook cover.
This is the needlebook. One nice thing about quilting and scrapping is the number of tools that can be used for both types of project. I used my die cutting machine and some QuikKutz and Tim Holtz dies to cut out the pieces for this needlebook. The flowers are attached with french knots, and the leaves (which I hand cut) with a simple vein down the center. All of the felt is from Papertrey Ink - they make a gorgeous range of colors and it cuts like butter. I used a white lining and a piece of the melon berry felt for the inner leaves of the needlebook. The recipient's name is embroidered in the upper right quadrant, but I blurred it out in case she reads my blog.

The lining: 
The quilter who gets the needle book will also be getting this notebook and notebook cover:

I dyed dryer sheets with Dyna Flow to try to get green and teal colors that would coordinate with the background fabric. While the green turned out great, the teal was not as bright as I had wished. I pulled out the die cut machine again and cut a variety of circles and rings, then arranged them on top of 2 layers of un-dyed dryer sheets (to brighten the colors and reduce the transparency) below the colored circles. I fused on a very thin layer of angelina fibers to give it some shimmer. I layered the background fabric and a stabilizer, then free motion stitched the circles onto them and trimmed away the excess, undyed dryer sheets. Some beads and couching with a variegated yarn in green and teals finished it up.
I made one more notebook cover; this one will probably be for one of the boys' teachers, and I'll be making another one for my other son's teachers. I went simple with this just fused a beautiful peony blossom onto a green pinked square, and added them to a dark brown speckled fabric. A bit of stippling brightened up the brown fabric.

Sunday, November 13, 2011
Seahorse Quilts
So I finished Jeremy's seahorse quilt before the end of August, but just haven't managed to get pictures taken and posted. I made time to do so today. When I wrote about it last, he'd had me paint onto the partially-quilted surface - a new adventure for me. I then quilted in the water, using multiple shades of blue threads in the painted areas, and a slightly blued white thread in the unpainted parts of the background. In keeping with his preference for all things shiny, all of the threads were shimmery and glittery. I also added some hotfix crystals for "bubbles". I satin stitched the edges and couched a single frame of a multihued fiber (perfect for this little quilt, with blues, teals and browns) around the outer edge.
I brought it to Jeremy, showed it to him, and asked him if he liked it. Those of you who read this post are probably shaking your heads right now, thinking "she'll never learn." Sure enough, Jeremy did not agree with me that the piece was complete. He looked at it for a few minutes, told me how much he loved the paint and the crystals, and then informed me that it needed another row of the fibers along the outer edge, just a little bit apart from the first one.
"No, it's fine as it is", I insisted. It looked complete to me. But he turned on those baby blues of his and I added another row of the fiber. And I have to admit, that while it was just fine with one fiber border, the second border really added definition and set off the piece better. And here it is:

And a detail shot of the seahorse on the bottom:

So I moved onto the original piece I had intended to make before this little side trip. It is a beach-themed, mixed media piece called "Live in the Current".

The 3 main panels were cut from felted wool, in shades of blue, green, and purple, that was needle felted directly to batting. After the felting was done, I hand-stitched a variety of fibers on the top, and did some embroidery as well. I fused the needle felted sheet to timtex to give it some stiffness, added backing, and did light machine quilting to give additional texture. I then cut it into three panels, and did a double-layer of satin stitch in a variegated thread to finish them off.

The "library cards" are digital images by Katie Pertiet (Library Card Collection: Seaside) that were printed onto background fabric that I made in Susan Brubaker Knapp's class in June. The background fabric was painted with very dilute Lumiere paint, and it glitters slightly. I batted and back them, then stitched outline stitched the critters and the lines of the index cards with Monopoly thread. I inked the edges for a little more definition, and attached them to the felted cards with small clips.


The background has the same seahorse and seaweed used in Jeremy's quilt on the right, as well as a shell on the top-left corner. These were stenciled with Shiva paint sticks. I used two of the images from Katie Pertiet's Beachy Clusters to create the layers and cut stencils. I used a Silhouette America cut file to create a stencil for the seaweed.

Sunday, October 23, 2011
Witches hats and acorn treats
Do you pin? I'm talking about Pinterest, a digital pinboard site that allows the collection of themed pictures of your choosing. It's a total time sink, and I can spend hours there looking through the art, crafts, foods, decorating, and other images that are pinned to peoples' boards. My boards are here, if you're interested in taking a look or, even better, following my boards.
I've had fun the last few days making Halloween treats and some fall snacks, all thanks to Pinterest.
First up: witches' hats. The directions are found here. If you go to the recipe, you'll see that the professional's look much better than mine. I used cookie icing, instead of a thin frosting, to make the bows, and they got all melty. That didn't stop the kids from eating them, though!
 | ||||
| Sweet witch hats. |
 |
| Yummy! |
And finally, a pin that showed gorgeous single-serve apple pies in a basket, with a link to Williams-Sonoma and their apple pocket pie mold. Here are mine. Jeremy absolutely loves any kind of pie, and had a ball helping me make a few of these today. They'll fit right into a sandwich bag and he can pack them in his lunch.
 |
| Mmmm... just needs a spoonful of ice cream. |
I'm also going to make the oreo cookie mummy pops again (see last year's post), over the next evening or two. I have the correct eyes this time, so hopefully they'll look even better this year.
Subscribe to:
Posts (Atom)